In this section, we will explore the process of importing a precipitation radar map into our app using OpenWeatherMap and Leaflet.
OpenWeatherMap offers the Weather maps API (https://openweathermap.org/api/weathermaps) for unpaid users. This API accepts various parameters and returns a PNG image. Our objective is to combine this image with our map.
Leaflet, on the other hand, is a powerful open-source JavaScript library specifically designed for creating interactive maps. With Leaflet, we can render map displays, add markers or widgets to the map, incorporate additional layers, and more. This capability allows us to easily integrate the precipitation layer onto our map.
Back to the code, we need to install the Leaflet dependencies by using the npm install command. Since we are working with React.js, we could use React-Leaflet into our project. React-Leaflet is a third-party library that builds upon Leaflet by providing a convenient wrapper and a collection of React components that can be used directly.
1 | npm install leaflet react-leaflet |
1 | import { MapContainer, TileLayer } from 'react-leaflet' |
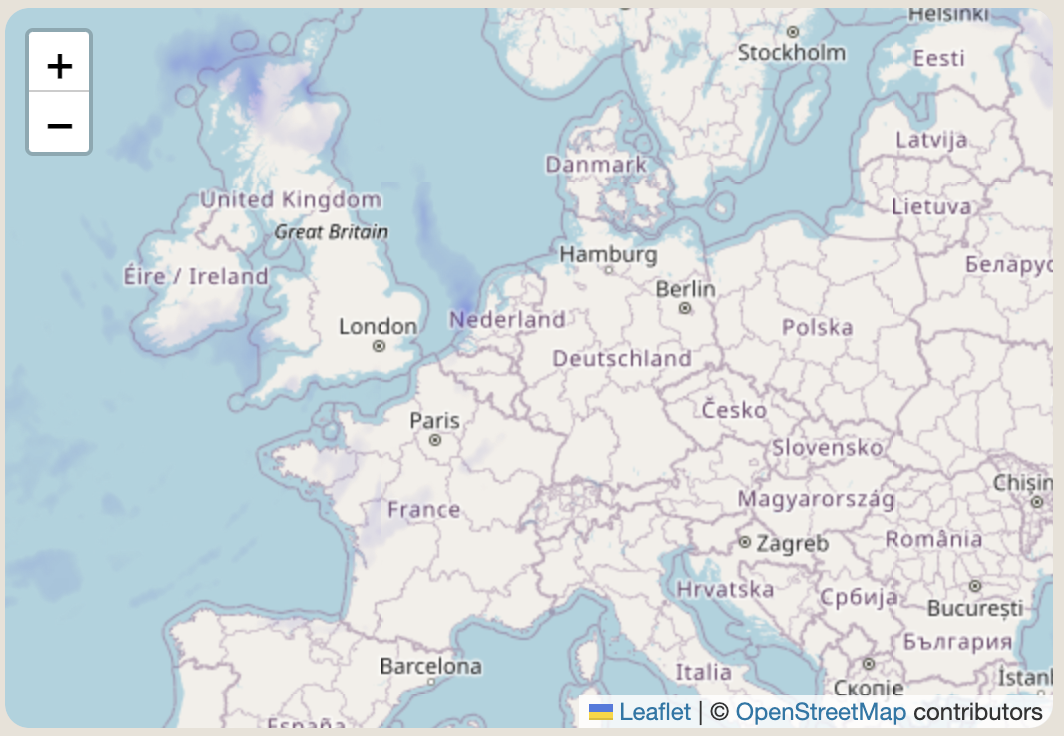
In our code, we can create a WeatherMap component. Within this component, we only need to include a MapContainer component provided by react-leaflet. Within the MapContainer, we can add two TileLayer components. The first TileLayer represents the basic map layer, which is provided by OpenStreetMap. The second TileLayer represents the precipitation forecast map, which is obtained from the OpenWeatherMap API. When we run the code, the browser will display the precipitation forecast map correctly.
Lastly, since we are using Next.js. We may encounter the following error in the console when we direct import WeatherMap component.
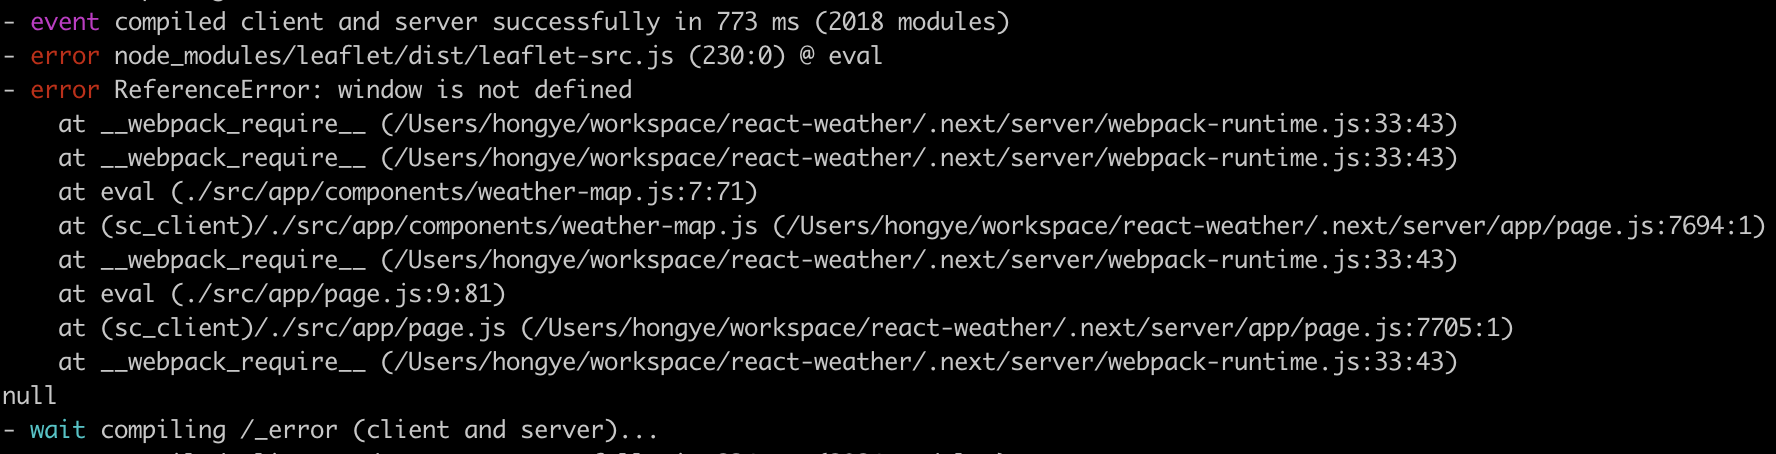
The error mentions that “window is not defined”. This is because we are using Next.js and it provides SSR (server-side rendering) function. When leaflet js attemp to access the global varible window which is only defined when your code run in browser (not SSR). So that, we could use dynamic import with no ssr to address this issue.
1 | import dynamic from 'next/dynamic' |
By using the above code, the WeatherMap component will be dynamically imported and rendered without server-side rendering. This resolves the “window is not defined” error.
We could find out more information about this issue via https://github.com/PaulLeCam/react-leaflet/issues/956 It provides additional insights and discussions on how to handle this problem within Next.js.
- View full code base of the weather app via my github: react-weather
- React-leaflet Error: window not defined